|
Method:
1. Put the sugar, golden
syrup, butter, molasses and spices into a pan and heat slowly. When
the mixture is runny, let simmer until all the sugar has melted.
2. Turn off the heat and pour
in the water. Stir, and set aside to cool.
3. Sift the flour into a large
basin, and add the bicarbonate of soda. Pour in the liquid mixture,
and stir round till the dough is quite stiff - add a little more flour
if necessary.
4. Refrigerate for
approximately twelve hours - this will make the dough hard, and much
easier to work with.
|
4. Bake in the oven at Gas
Mark 6 (200°C 400°F). After ten minutes they should have puffed up
considerably. Take the gingerbread shapes out of the oven and place
the templates over them again. Cut off the excess gingerbread and
re-cut the windows if necessary. Put them back in the oven to bake for
a further few minutes, until they are quite brown.
5. Cover a board with tin
foil, and work out how you will want the house to stand.
6. Heat two ounces (50 g) of
sugar in a heavy-bottomed pan, and stir round as it starts to melt. If
you are using white sugar you will be able to see when it begins to
brown.
7. When the sugar is toffee
coloured, turn off the heat and quickly dribble it over the edges of
one of the gingerbread slabs. Holding the pieces in place on the
board, stick them together this way. (Diagram 2) The mixture hardens
as it cools, so work as quickly as possible. Don’t worry if there
are cracks between the walls and roof of your house - these can be
filled with icing.
|
Diagram 2
|
|
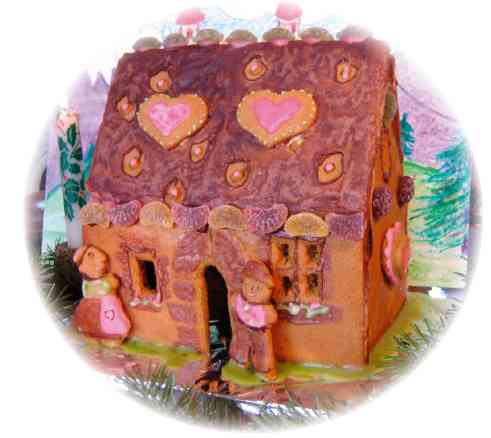
Decorating the
House
Now comes the fun part! It is
really up to you how you decorate your house. Favourite sweets can be
used, different coloured icing, and biscuits, or left over gingerbread
scraps, can be stuck to the roof or walls. To make up a small amount of
icing, sift two ounces (50 g) of icing sugar into a bowl, and add a few
drops of liquid. Coffee will make a brown which is good for filling in
any cracks in the house, and natural dyes can easily be obtained from
the garden. On the picture, spinach was used for the green, and
raspberries for the pink. Pound the item in a pestle and mortar until it
starts to look juicy, then squeeze it through muslin (diagram 3).
Icing can be applied with a
piping bag, but unless you have used a piping bag before, a paint brush
will be neater and easier to control.
Display your finished house in a
cool, dry room
and eat within a month.
|
Diagram 3
|
|
Note 1: Any left-over
gingerbread dough can be made into people, hearts, or other shapes,
which can be stuck to the house with icing later. The house can be
decorated before baking with little pieces of dough, which stick on
during cooking.
The ‘curved stones’ on the
picture were done this way. |